
An introduction to creating professional looking documents with Markdown
This is a tutorial on creating visually appealing documents with Markdown and then converting them into Latex for further processing or exporting them as Pdf’s. It uses the packages Pandoc and Pdflatex.
Introduction
Throughout the last couple of years I’ve been trying to figure out the best way to keep my notes organized. For notes I take on paper, I keep them in folders for each project or class. Sometimes I keep physical note books for that as well. Here, we will focus on the most recent method I started using to organize my digital notes. I have tried a multitude of programs ranging from plain text files to softwares like the ever so popular Evernote 1. However, none of them worked for me. Text files aren’t capable of keeping images and tables etc. but that’s what they are there for - to save plain text. Evernote fares much better in that aspect since it can store images, tables and all that. However, the main issues with Evernote is that it cannot handle advance formatting such as Latex formulas and it also doesn’t allow exporting the documents to other formats. Markdown, on the other hand, can do all that and much more.
Markdown is a simple text syntax that is very portable and has rich formatting. You could use any text editor to write Markdown and you can save it anywhere. It is very straightforward and easy to learn. For example, hashtags define titles and control their sizes. “# Title” gives a title. “## Subtitle” would be a little smaller, “### Sub-subtitle” would be even smaller and so on. Typing in a “-“ , “+” or “*” before any item automatically generates bulleted lists. You could use numbers instead for numbered lists in a similar manner. I won’t dive into how to write in Markdown in this tutorial but here are two tutorials that teache you how to do that:
- https://github.com/adam-p/markdown-here/wiki/Markdown-Cheatsheet
- http://support.typora.io/Markdown-Reference/
Just remember to save your file in the .md format.
One of the major reasons I switched to Markdown is the ability to write in-line formulas. Markdown follows a syntax similar to Latex where “$$” is used to enclose the formula. This format is preserved when Markdown is exported to a Latex file.
Examples:
• $LaNiO_3$ gives \(LaNiO_3\)
• The following code block
$$
n_{\vec{k} i j}=\sum_{\lambda} U_{\vec{k} i \lambda}^{DMFT}
\cdot w_{\vec{k} \lambda} \cdot U_{\vec{k} j \lambda}^{DMFT*}
$$ {#eq:equationlabel}
gives
\[n_{\vec{k}ij}=\sum_{\lambda} U_{\vec{k}i\lambda}^{DMFT} \cdot w_{\vec{k} \lambda} \cdot U_{\vec{k} j \lambda}^{DMFT*}\]If you have a series of formulas, they will be numbered automatically. In the exported Latex document they will appear inside a \equation block. {#eq:equationlabel} is set as a label for the equation to be referenced by @eq:equationlabel. For figures it would be {#fig:figurelabel} and {#tbl:tablelabel} for tables. The section labels are labelled automatically based on the name of the section and can be references by for example, @sec:prerequisites.
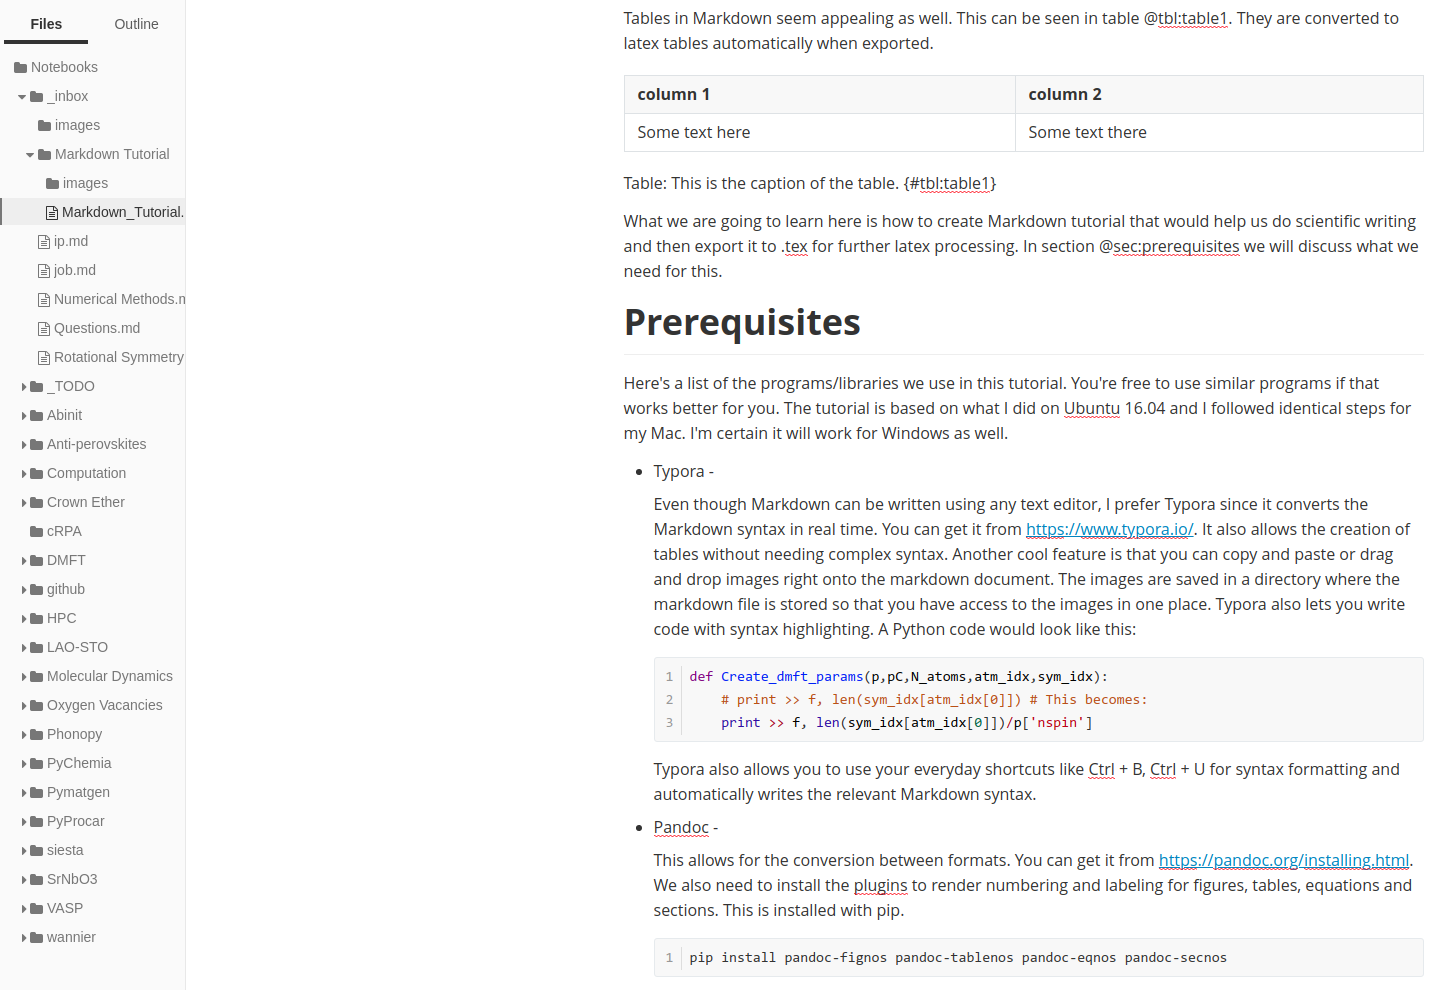
Tables in Markdown seem appealing as well. This can be seen in the following table. They are converted to latex tables automatically when exported.
| column 1 | column 2 |
|---|---|
| Some text here | Some text there |
What we are going to learn here is how to create Markdown documents that would help us do scientific writing and then export it to .tex for further latex processing. In the following section we will discuss what we need for this.
Prerequisites
Here’s a list of the programs/libraries we use in this tutorial. You’re free to use similar programs if that works better for you. The tutorial is based on what I did on Ubuntu 16.04 and I followed identical steps for my Mac. I’m certain it will work for Windows as well.
• Typora -
Even though Markdown can be written using any text editor, I prefer Typora since it converts the Markdown syntax in real time. You can get it from https://www.typora.io/. It also allows the creation of tables without needing complex syntax. Another cool feature is that you can copy and paste or drag and drop images right onto the markdown document. The images are saved in a directory where the markdown file is stored so that you have access to the images in one place. Typora also lets you write code with syntax highlighting. A Python code would look like this:
def Create_dmft_params(p,pC,N_atoms,atm_idx,sym_idx):
    #print >> f, len(sym_idx[atm_idx[0]]) # This becomes:
    print >> f, len(sym_idx[atm_idx[0]])/p['nspin']
Typora also allows you to use your everyday shortcuts like Ctrl + B, Ctrl + U for syntax formatting and automatically writes the relevant Markdown syntax. Writing Markdown in Typora is a smooth experience. It has a folder tree to easily access your notes. A snapshot of my Typora setup is shown below.
• Pandoc -
This allows for the conversion between formats. You can get it from https://pandoc.org/installing.html. We also need to install the plugins to render numbering and labeling for figures, tables, equations and sections. This is installed with pip.
pip install pandoc-fignos pandoc-tablenos pandoc-eqnos pandoc-secnos
Another thing we need to be careful about is which pandoc the system is using since anaconda has its own outdated version of it. If this is the case rename the anaconda version to something else so that the system only uses the generic version of pandoc.
• Dropbox or equivalent -
Unlike softwares like Evernote that store notes on their own servers in their own format, Markdown files can be saved anywhere in your storage since they are just like another text file. However, I prefer them to sync between computers so I use Dropbox. I have a directory called Notebooks in which I create folders for each project where I create the .md files for each note.
• Latex -
The conversion between .tex to .pdf requires pdflatex which comes with the latex installation. Also, once your Markdown file is converted to a .tex file, you may want to fine tune it a bit in either Overleaf or if you want Latex on your computer you can install it from https://www.latex-project.org/get/. I recommend the program Texmaker.
Writing in Markdown
Let’s see what an example Markdown document for our purposes would look like.
---
title: Generating Latex and Pdf documents with Markdown
bibliography: references.bib
abstract: In this tutorial we explore how to generate
visually appealing documents with Markdown and then convert
them into Latex for further processing or export them as Pdf.
All the required files are found in the same directory where
this Pdf is located in.
---
# Introduction
## Tables
Let's start with a table as seen in table @tbl:table1.
| column 1 | column 2 |
Table:This is the caption of the table. {#tbl:table1}
Typora automatically creates a table once you have | column 1 | column 2 |.
Or you can get it from the menu bar.
## Figures
Figures in Markdown are cool. You can just copy paste them from anywhere and
it would be saved into a directory where your Markdown file is. Once pasted,
Typora will automatically generate the following string. To reference this
image in your paragraph just use @fig:figurelabel.
{#fig:figurelabel}
## References
We can also use references from a bibtex file, say references.bib, which
should be in the same directory. Simply refer to it by, [@nameofbibtexentry].
## Formulas
Inline math equations are surrounded by $\alpha$.
For detailed equations use $$..$$ as shown in @eq:equationlabel.
$$
y = mx + c
$$ {#eq:equationlabel}
The header contains the title, name of the bibtex file, abstract and so on. I have hard coded the author and affiliation in the default.latex file but one may use tags such as date, author, affiliation etc. You can look for YAML Front Matter for more details.
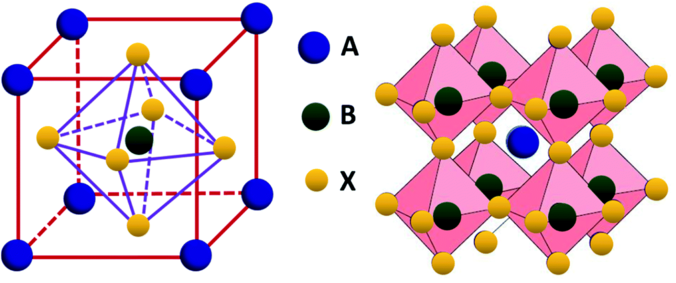
Images in Markdown look like the one below. To make things look better, you can modify the latex file and use sub-figures and so on.
References are used just like in Latex. You create a .bib file with all the bibtex entries and refer to each of them with the @ symbol. In latex this is converted to \citep.
E.g. -
PyProcar [@HERATH2019107080]
gives PyProcar2.
Converting Markdown to Latex
Once we’re done writing our Markdown document, say example.md, we have to convert it into Latex. This is where Pandoc comes in. The settings file is in ~/.pandoc/templates/default.latex. You can create it if it’s not there. This tells Pandoc how to convert the Markdown file into Latex. I have my modified default.latex file in the same directory as this tutorial, but for an updated version get it from my github fork here. You should take a look at the section (shown below) where I have my name and affiliation and change yours accordingly.
...
% Customized details
\author[]{Uthpala Herath}
\affil[]{\textit{Department of Physics and Astronomy,\protect\\
West Virginia University,\protect\\ Morgantown, WV 26505-6315, USA}}
...
If not, you can always set it in the Markdown header.
Next, we are going to use the scripts maketex and makepdf I wrote to generate the Latex file and a pdf respectively. The updated versions of these can be found in the /scripts directory of my fork. Remember to keep them in a location where you can run them globally.
(1). maketex -
This converts the .md file to a .tex file so that it can be used as a starting point for a better Latex document which can be shared with collaborators on Overleaf.
Usage:
maketex example.md example.tex
(2). makepdf -
This converts the .md file first to a .tex file and then generates a Pdf from that.
Usage:
makepdf example.md
(3). makebeamer -
This converts the .md file into a beamer (presentation slides) pdf. Remember to add a theme in your YAML front matter such as theme: Warsaw.
Usage:
makebeamer example.md
This web page itself was created using Markdown. The script makehtml comes in handy to achieve that.
Well, I hope you enjoy Markdown as much as I do. It could be used as a good starting point to gather data and figures and keep all that in one place which is updated regularly until it’s ready for publication. If a report is required along the way, you can generate a professional looking Latex Pdf document with the scripts mentioned above.
Comments